Wednesday, December 31, 2008

New Critters!

Not only is there a new Scrap Bat flapping around but there is also a mysterious little bunny that snuck in one night and has yet to leave.


Sverrir & Mini Ninja Bunny Foo

As you can see the bunny tries to practice his stealth on the Bats but he's just not very good at it... yet.


xx ~Static

Tuesday, December 16, 2008

Etsy Dark Side Finds: The Island of Misfit Toys theme

Welcome to the Etsy Dark Side. We are the roaming fox fires in the darkness, the sparkling mist in the ever shifting shadows, faerie rings flow in our wake. Come join us!

Today's Finder

Static White

Christmas Calamities Hunter 

by TheTinyTragedies ♦ $20.00


Not signed up with Etsy yet? For shame!

Signing up is free and easy. Just click here & begin enjoying all the hand made, unique wonders Etsy has to offer.

Don't forget to search the keyword "EtsyDarkTeam" !

Zombie Sleepover Diorama

by MrsEvils ♦ $130.00


Come join the Dark Side

Death Mask Dolly Day of the Dead Shadowbox 

by SpookyLane ♦ $39.99


OOAK Devilish Bear - Lutina Raye and Red Rose Brooch Pin

by SWStitchery ♦ $117.00


Pixie 10 x 8

by DragonRags ♦ $15.00


Handmade Horrors Grenade Pin Color Choice

by HandmadeHorrors ♦ $4.00


  Made any EtsyDarkTeam purchases lately? Let me know!

  Don't forget to keep those reviews coming, my darklings.

  Buyers are welcome to join in the fun, just send me your thoughts on your EtsyDarkTeam purchases with a link to the item(s) and I'll post the review!

Team members:

  How to be included in the Etsy Dark Side Finds, you ask? Well hop onto our forum and join in the Exhibition run by SacredOak & HandmadeHorrors. Enter up to 3 items related to the current month's theme. (See the forum for more details)

  Once a month I'll be choosing one item from each shop in the Exhibition to be promo'd here!

xx ~Static

Saturday, December 13, 2008

How-To: Inexpensive Trimmed Tablecloths

Whether your purse strings are strained or you just want some nice tablecloths without spending an arm and a leg at local chain store, and have some time to spare, here's a way to do it!

I made these for my very low budget, non-traditional wedding reception and they were an absolute hit. 2 in Sage Green, 2 in Ivory. With different colors sheets and trim you could make festive tablecloths for every season or holiday!

Did you know a full sized flat sheet fits a banquet sized table (4-6 seats) with a little adjustment? I did after a bit of math!

♦♦♦♦ ♦♦♦♦ ♦♦♦♦ ♦♦♦♦

Ingredients for 1 tablecloth:

♦ 1 Full sized Flat sheets from Wallyworld (*boo hiss* I know but as cheap as $3 each in-store), Tarjay, local Good Will, FreeCycle (free!), etc

♦ approx 10.25 yds* of Trim** for 1 tablecloth

♦ Seam ripper ~or~ tiny scissors, a needle & much patience

♦ A spool of black thread ~or~ whatever color matches the edges of your chosen trim

♦ Sewing machine

[*To get a more accurate measurement add the length & width of you fabric x 2 /36 = approx how many yards you need. Be sure to round up to the 1/4 yard for overlap and matching pattern! Ex: my flat sheets 81"W + 102"L x2 /36 = 10.17yds, rounded up to 10.25yds of trim per sheet. You'd rather have too much than not enough!

**I got my Celtic Trim from Cheeptrims.com. There is a min order of $60, I ordered other needed supplies at the same time to meet the min.]

♦♦♦♦ ♦♦♦♦ ♦♦♦♦ ♦♦♦♦

Start by finding the wide hemmed end of the sheet, the end that would be up by the pillows if you were putting it on your bed. Using a seam ripper take out all the stitches that hold down this fold. Press out the long crease across the sheet, leaving the edges alone. Lots of pressing is key. It gives you nice crisp edges, sharp corners and a professional look!

Now you have some raw edges at one end of your sheet (about 12" on either side and one end completely). You will want to copy the rolled hem that is on the rest of the sheet. That's why you don't press out the edges right away so you can use it as a guide. Don't worry about the color of the thread here you will not see the stitches once the trim is added.

How to roll hem on the final, short end: Fold over the edge 1/4", press, fold over again, press, and then sew a row of stitches down the middle.

I suggest washing the sheets at this point so if there is any shrinkage or extra dye to get out of them now is the time so you don't get wonky looking trim later on. Dry and iron if necessary.

Now it is time to add the trim! I prefer the look of miter corners because I'm, well... a tad perfectionist. I even made the pattern match if you look real close. But you can overlap the corners at 90 degree angles, etc. Whatever is easiest for you!

(It helps to have more table space than I do also^^)

This part is an easy straight stitch. Line up your trim with the edge of your fabric. Use as many pins as you need. Top stitch all of the outside edge first, do your best to stay about 1/8" inside from the edge of you trim, then the inside edges.

Press on the wrong side of the fabric so you don't damage your trim and voila! You're done.

©2008 Maya/Static White/Static White's Stitchery

Link back to this to your heart's content but please do not copy and paste my content! I worked hard to put this together. Give credit where credit is due.

Friday, December 12, 2008

Featured!: SWStitchery.Etsy.com on Blogasaurus

It's so great when I stumble across things like this. My Skully Elf Ornament was featured on Blog.Blogasaurus.com!

Check it out here: Not so traditional Christmas - http://blog.glamasaurus.com/2008/11/28/not-so-traditional-christmas/

xx ~Static

Winter Wondrous!

So on the night of our first snow I finally finished my niece's holiday dress.

This is the first time I've done a dress like this and on such a small scale (3T) so of course I went all out. The dress is Silk, the Sash & custom made trim is Satin Brocade and the lining is Satin. To top it all off the hem, lining & casing were all stitched by hand! I'm insane, I know, but I think it was all worth it. I can't wait to have pics of her wearing it!


See, Sis? Not everything I make is black!! :p

Saturday, December 6, 2008

OOAK Hand stitched Felt Ornaments!

My hand stitched felt ornaments are going, going, going. Woo! I had a 20+ that never made it to my Etsy shop! There are a few left from the last batch...


And, a Custom Listing for Maneki Neko (Lucky Cat) Ornaments! Choose you color & beckoning paw...

If it has sold, don't worry, as soon as I'm done with the custom order the listing will be back up again. So be sure to check back!


xx ~Static

Thursday, November 27, 2008

Etsy Dark Side Finds: Tim Burton-esque/Tim Burton Style

Welcome to the Etsy Dark Side. We are the roaming fox fires in the darkness, the sparkling mist in the ever shifting shadows, faerie rings flow in our wake. Come join us!

♦♦♦♦

This month the Finds is filled to the brim with all sorts of Tim Burton inspired goodies! See the entire Exhibition here!

Today's Finder

Static White

Jack Loves Sally Ribbon Choker

by HandmadeHorrors ♦ $10.00

Not signed up with Etsy yet? For shame!

Signing up is free and easy. Just click here & begin enjoying all the hand made, unique wonders Etsy has to offer.

Don't forget to search the keyword "EtsyDarkTeam" !


Bat Sprinkles - Confetti - Black and White - 400 Count

StemOfThorns ♦ $5.00

Come join the Dark Side


The Skeleton Cabaret - Black Wool Hat OOAK

DBVictoria ♦ $35.00


Sweeney Todd Inspired Necklace

AbyssmalGems$20.00

Victorian Filigree Framed Sweeny Todd Johnny Depp Brooch or Pendant

AgonysDecay ♦ $8.00

The Story of Emily - An Earring Wardrobe in White

BellaLili ♦ $25.00

Magpie Blues dreadfalls

The13thGypsy ♦ $75.00


Bone Daddy bone doll

BisectedBeauty ♦ $40.00

Jack And Sally Nightmare Before Christmas Inspired Rag Dolls Hand Stitched Creepy Gothic Folk Art By Jodi Cain

TatteredRags ♦ $150.00


Corpse Bride Wrap Top

WingsOfSin ♦ $32.00


Gothic Victorian White Lace and Pearl Choker

KaleidoskopicRomance ♦ $25.00


White Bat Haunted Mansion Mouse Ears

CyberIndustries ♦ $10.00


Skully Elf Mascot Ornament - Red, White, Black - hand stitched felt OOAK

SWStitchery ♦ $18.00


The Eva Necklace - Black Beaded Choker

Room3Designs ♦ $18.00


Fairy Freedom

TheTinyTragedies ♦ $120.00

Dia de los Muertos Bat Skeleton in graveyard original wood box tile painting

NatashaBlue ♦ $25.00


Waiting for Jack Original Painting 12 by 12

FugsArt ♦ $24.00

Made any EtsyDarkTeam purchases lately? Let me know!

Don't forget to keep those reviews coming, my darklings.

Buyers are welcome to join in the fun, just send me your thoughts on your EtsyDarkTeam purchases with a link to the item(s) and I'll post the review!

Team members:

How to be included in the Etsy Dark Side Finds, you ask? Well hop onto our forum and join in the Exhibition run by SacredOak & HandmadeHorrors. Enter up to 3 items related to the current month's theme. (See the forum for more details)

Once a month I'll be choosing one item from each shop in the Exhibition to be promo'd here!

xx ~Static

Thought of the Moment

Microwaved raisins are little balls of hellfire. Put them in the oatmeal after you heat it.

Tuesday, November 18, 2008

Featured!: SWStitchery.Etsy.com on ChewGumAndWalk

Check it out, I was included in Chew Gum and Walk's Holiday picks!:

http://deborahmarie.wordpress.com/2008/11/16/its-beginning-to-look-a-lot-like/

xx ~Static

Sunday, November 16, 2008

How-To: Inexpensive Party/Reception Favors

Here are the instructions on how to make the inexpensive bookmark/tea light/candy favors I came up with for my Celtic themed, after-wedding, sort-of-reception party.

Something like this would also be great for any type of party, especially if there is a theme. Just change the charm & colors to match the theme such as orange & black with bat charms for Halloween, or mix & match bright colors for a Mad Hatter Tea Party!

♦♦♦♦ ♦♦♦♦ ♦♦♦♦ ♦♦♦♦

Ingredients to make 36 party favors:


♦ 36 green chiffon circles*

♦ 180 iridescent wrapped fondant mints (about 2 bags)*

♦ 36 Vanilla and Mocha Java scented tea light candles in Ivory (from WorthySoyCandles.Etsy.com, best soy candles evah!)

♦ 24yds of 1/4" Ivory satin ribbon**

♦ 36 asst'd silver heart charms*

♦ 36 silver-toned jump rings*

♦ 2 sheets of white cardstock** & color printer

♦ 1 roll of Glue Dots**

♦ Scissors & patience ~or~ a 1.5"W circle punch

♦ Emery board/fine sandpaper

♦ Lighter

♦ Rubberband (optional)

[I got most of my supplies from *OrientalTrading.com and **Hobby Lobby. Coupons found on RetailMeNot.com made this even cheaper!]

♦♦♦♦ ♦♦♦♦ ♦♦♦♦ ♦♦♦♦


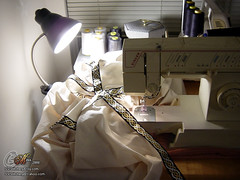
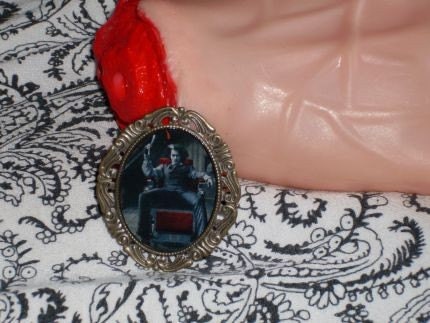
First I printed up a batch of claddaghs (www.aon-celtic.com) on white cardstock to cover the bottoms of the tea lights (you'll see why further down). I fit as many of the images as I could in Photoshop on an 8.5 x 11 sheet.

I used a tea light to draw a light circle around each claddagh and then cut them by hand. Use an emery board or fine sandpaper to smooth out any odd edges.

Use the Glue Dots to stick the claddaghs to the bottom of the tea lights.

Alternately, Microsoft Word should have a sticker template you can use or download. It needs to be 1.5" across to fit a WorthySoy tea light. You could probably print on sticker sheets but I was doing this on the cheap so that was out. And if you have a 1.5" circle punch it will save you time. But again keeping cost down I resisted the temptation to buy one.


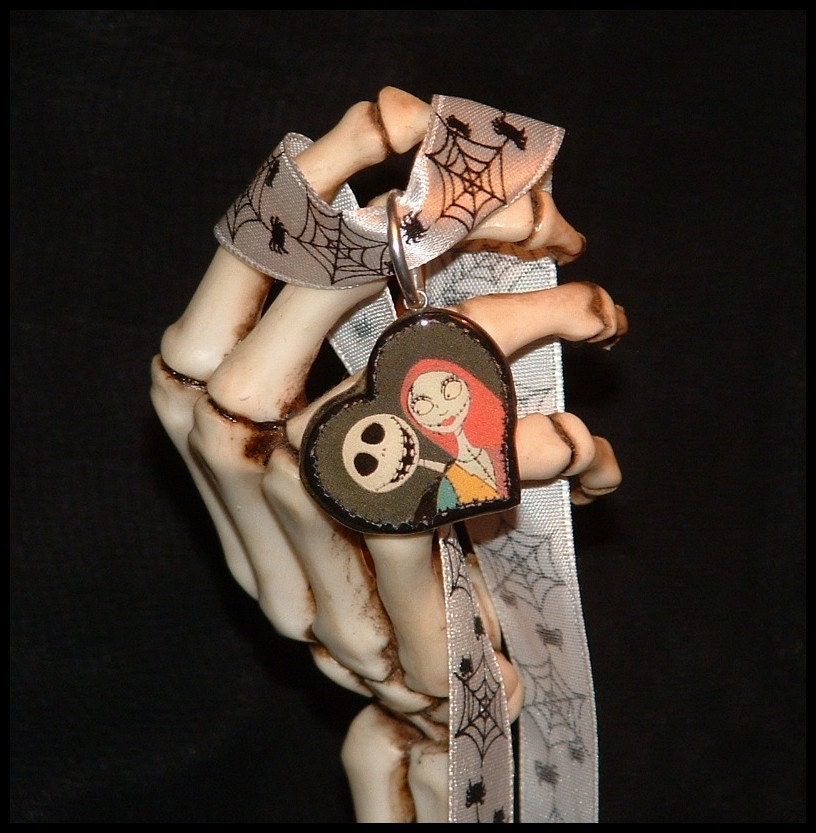
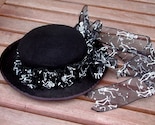
Next, cut 36 lengths of ribbon, 24" long each for the bookmark/favor ties. Melt the ends of the ribbon a bit with a lighter. It'll make it easier to thread the charm onto the ribbon and keep the ends from fraying.

Open a jump ring, thread on a charm, close the jump ring. Fold a length of ribbon in 1/2, put the loop end through the jump ring, then draw the two tail ends through the loop and pull snug. Do this 35 more times. You know have ribbon to tie your favors with that double as bookmarks!


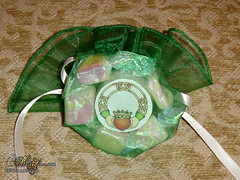
Take one chiffon circle and put 1 tea light & 5 fondant mints (I only ate one I swear) in the center. Gather up the edges of the circle.

Take one ribbon bookmark and wrap it around the chiffon you have gathered up and tie in a half knot opposite to the charm. Even out the chiffon and tie the ribbon in a nice bow.

Here is where the optional rubberband can come in handy, especially if you are doing these without extra helping hands. Put the rubberband loosely above where you will tie the ribbon. Add your ribbon bookmark, tie the bow and then remove the rubberband.

And that's it, now just do it 35 more times! ;D

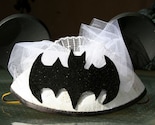
View from the bottom, because you KNOW people have to at least turn it over to see what's in it before they open it. Just in case there's eye of newt or sommat in it? I dunno. The iridescent wrappers on the fondant mints shimmers nicely through the chiffon.


Wad o' bookmarks & a finished party favor!


It is much easier if you have someone helping you with these, unlike myself that was a one woman mad whirlwind two months before my wedding. My theme song just before my wedding and party was "They're Coming to Take Me Away" (by Dr.Demento) because I did pretty much everything myself. Thank goodness we got married at the courthouse.

If you're going to do these for your wedding reception maybe add this to the list of activities for your wedding shower. Get those girlfriends to help you!

© Claddagh art by www.aon-celtic.com

All other content ©2008 Maya/Static White/Static White's Stitchery

Link back to this to your heart's content but please do not copy and paste my content! I worked hard to put this together. Give credit where credit is due.

Wednesday, November 12, 2008

Review: SWStitchery.Etsy.com

I ordered 36 white skull beads from SWStitchery. The beads arrived just perfect! They are so cute and will look awesome on what I'm making. The 'extras' she sent will be used on a little gift I'm making for myself. :)


Thank you so much Static! I will be ordering from you again for sure!
^^V^^

~BCCJuli

Blog Widget by LinkWithin